

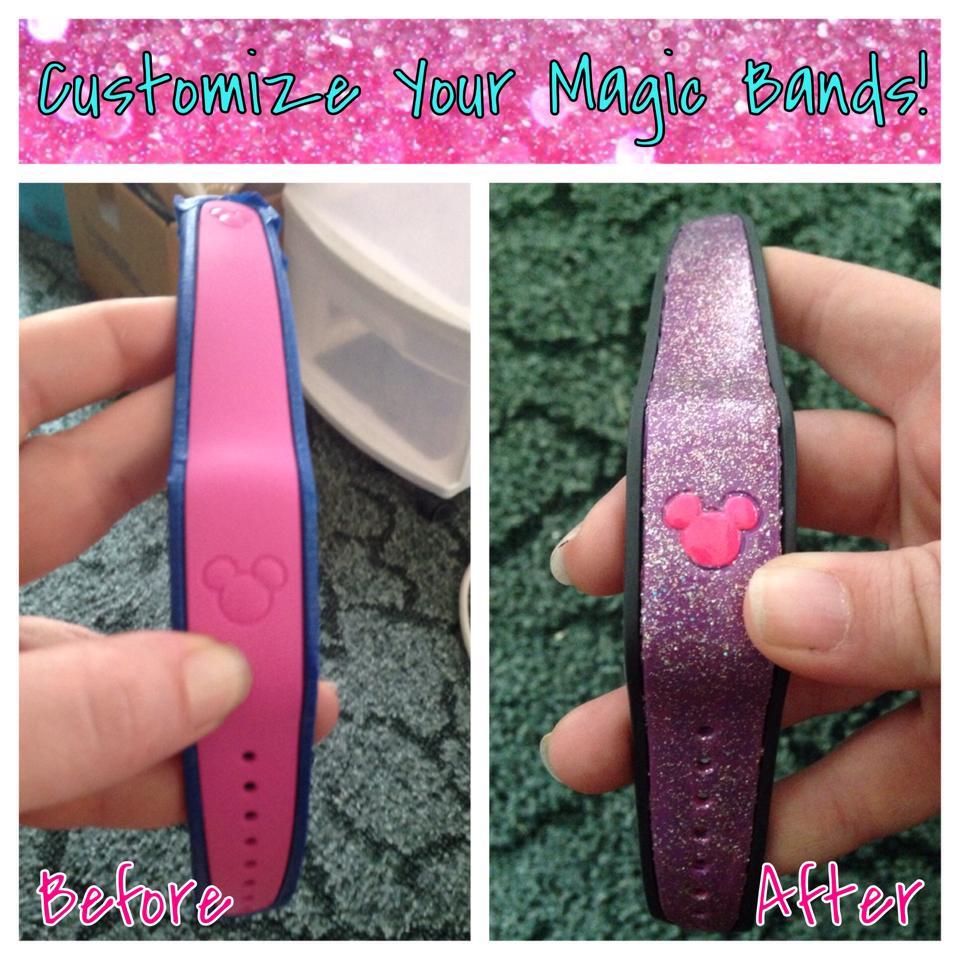
After several trips my husband & I have quite the collection of Magic Bands. We are also running out of colors that we want & don’t already have. I decided to set out on a new adventure to change them up!

[Editor’s Remarks: The following tutorial pictures the original MagicBand style, however the same techniques will work on the new MagicBand 2.0.)
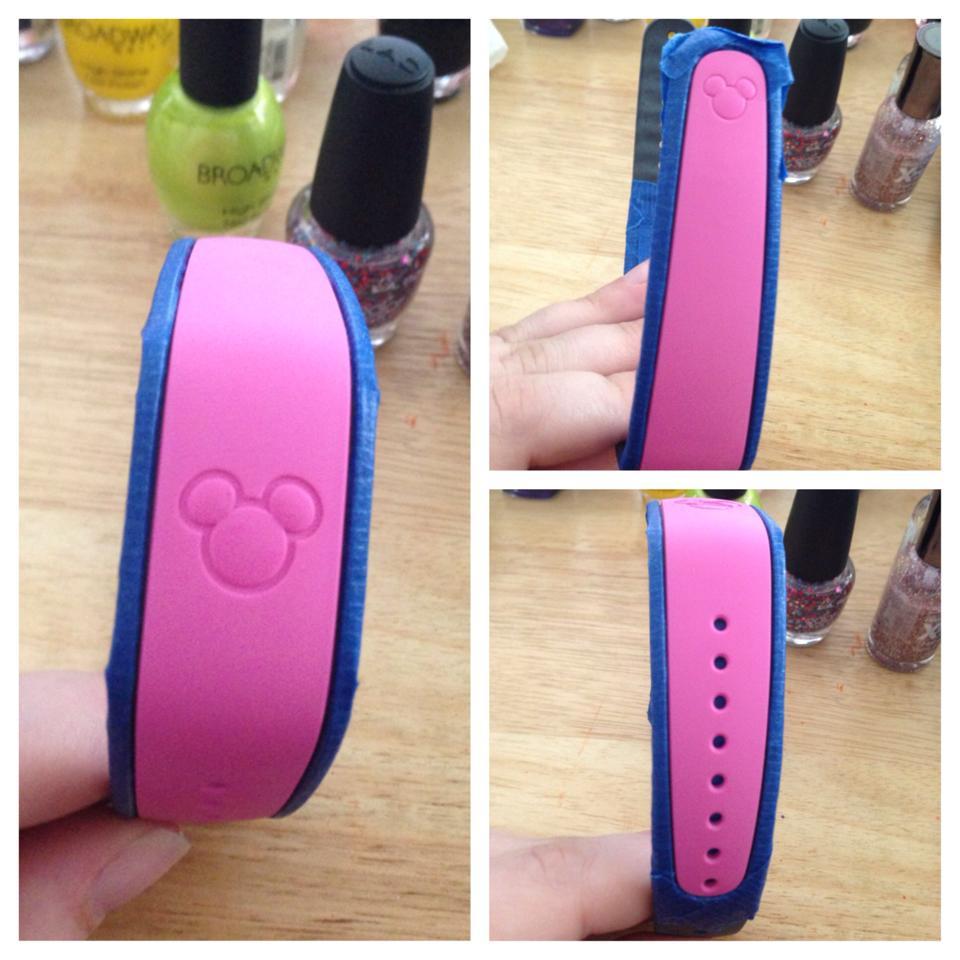
I started by taping the grey area around the Magic Band with painters tape. (Tip: Even if you plan on removing the grey area for smaller wrists, leave it on until you are done. It gives you an area that isn’t being painted to hold on to.)
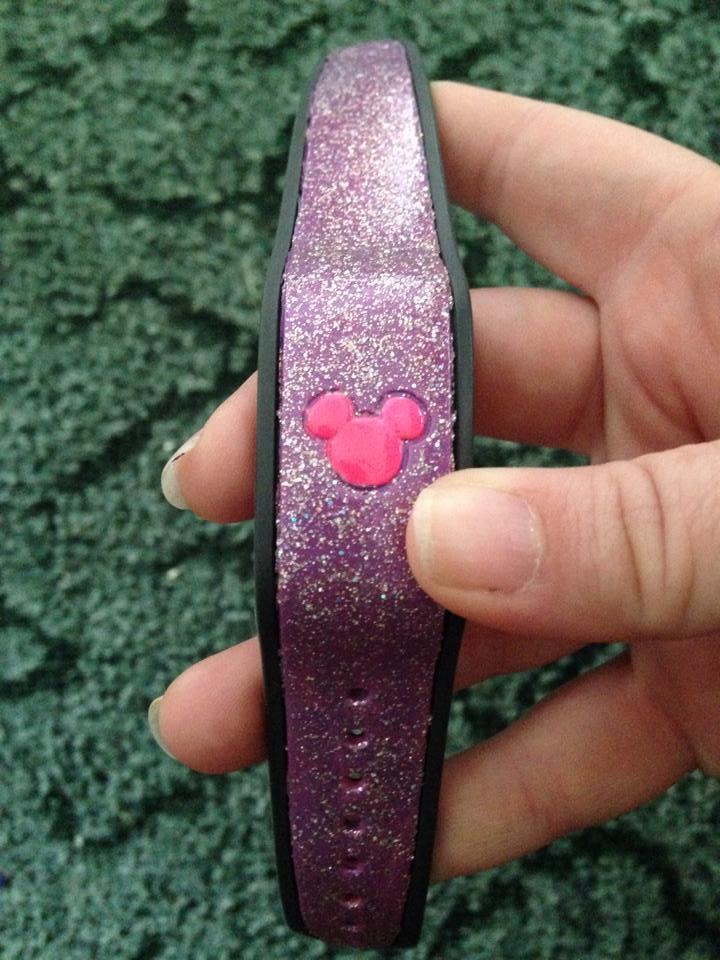
Next, I painted the entire pink area with two coats of purple nail polish. The nail polish didn’t look smooth. It was kind of bumpy & rough looking. But I went ahead with the plan & covered it in two coats of glitter nail polish. Let me tell you!! You can’t even tell the first two layers weren’t so great looking! Then I decided to make the Mickey head POP by painting it a different color. I started by painting it white & then covering with one layer of pink. To finish, I covered it with two layers of clear top coat. I took my Magic Band outside in the sunlight to see how the glitter looked and I fell IN LOVE! It is so sparkly & definitely just what this princess was looking for!
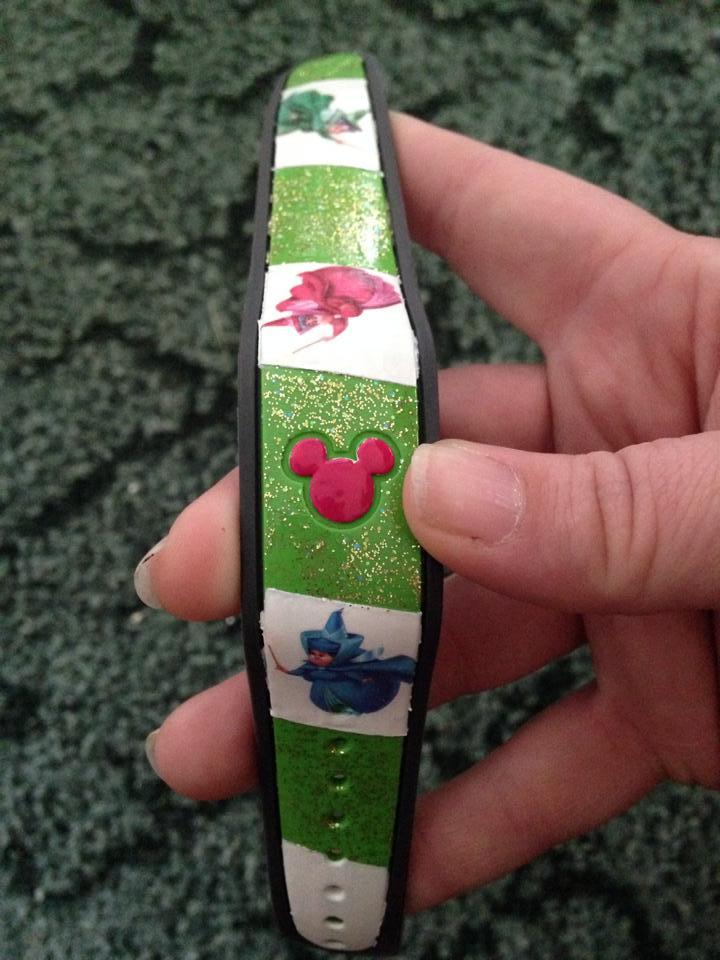
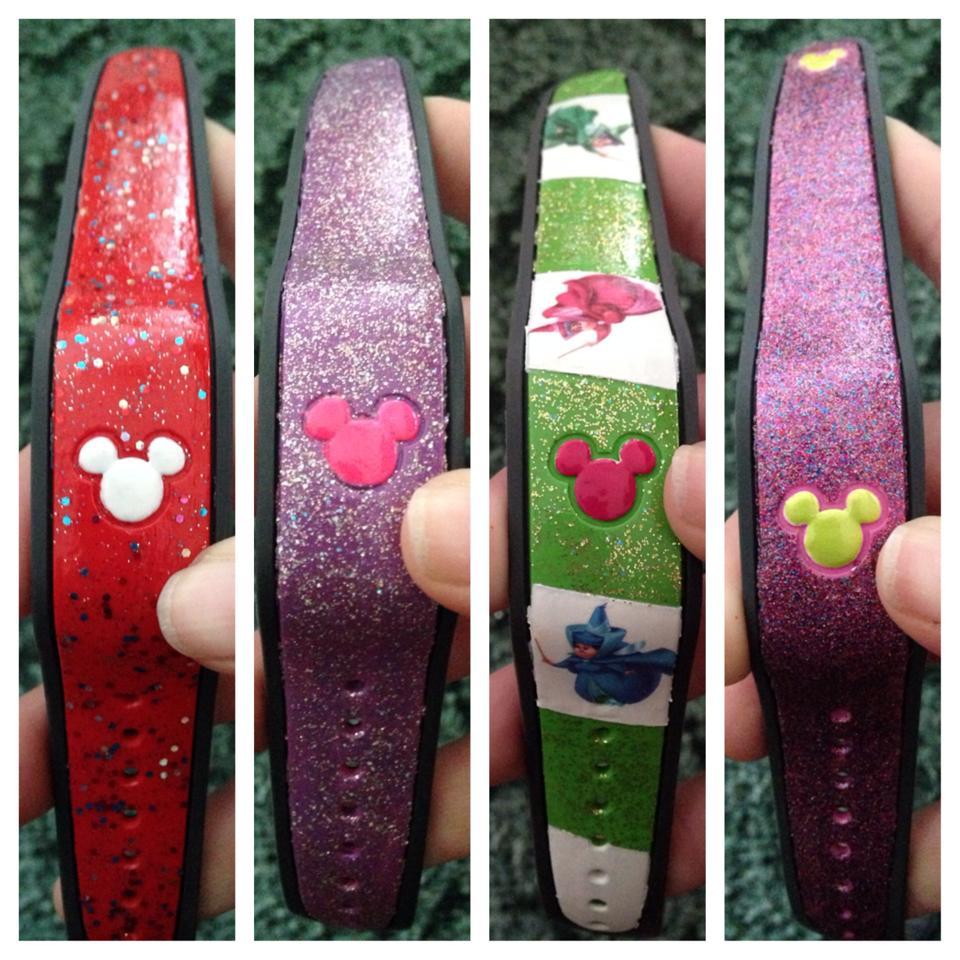
I knew I wanted glitter on ALL of my bands, but I didn’t want them to all be identical. For my next band I went searching dollar stores for Disney temporary tattoos. I had a pack of princess tattoos that had 3 small Flora, Fauna, & Merriweather tattoos that were the perfect size.
I started by taping the grey area of my Magic Band again. This time, I also added another layer of tape diagonally. I put each piece end to end then removed every other one to create stripes when painted. I removed the tape from every other section (making note of the sections I wanted to place the tattoos when finished) & painted three layers of white nail polish. I let it dry over night and applied the tattoos just as you would on skin. I removed the tape from the green stripes & painted two coats of gold glitter polish. I also repeated the same process as the first band to make the Mickey head pink. And again, I covered the entire band with 2 coats of clear top coat. Before removing the tape from the entire band, I used a knife to cut anywhere that the tattoo over lapped the colored area of the band & the grey outer edge.


Recent Comments